

Illustrative discussion about having an oral sleep appliance assessed
Specialized Care

Sleep Appliance Repair in Rockwood

Most of the attention goes to the moment something breaks. Yet the step people skip is the end: getting the mended appliance back and confirming it still does its job. From Rockwood, plan the whole repair, from first assessment to that final fit check, before you begin.

Planning a repair from start to finish, from Rockwood

Think about the last appointment first

When a sleep appliance cracks or a part works loose, the natural goal is to get it fixed. A better goal is to get it working again, which isn’t quite the same thing. An oral appliance only helps if it holds the lower jaw where your treatment plan says it should, so a repair is complete when that has been confirmed, not when the device comes back looking whole.

Setting up for that outcome starts at home. Gather the appliance and any pieces into a protective case, with the instructions and the name of the office or lab that made it. Note when the problem showed up and how. A drop, heat, recent dental work and a fit that had been slowly changing all point in different directions, and they shape both the repair and the later check.

Rockwood families often plan appointments a little further ahead, which suits this kind of care. When you call, we can talk about the damage, explain how assessment is arranged, and say whether the original lab or provider will need to be involved, since that affects how many visits to expect. Some devices can’t be repaired, and no part, timeline or warranty result can be promised until the appliance has been examined.

Plan your repair and fit check
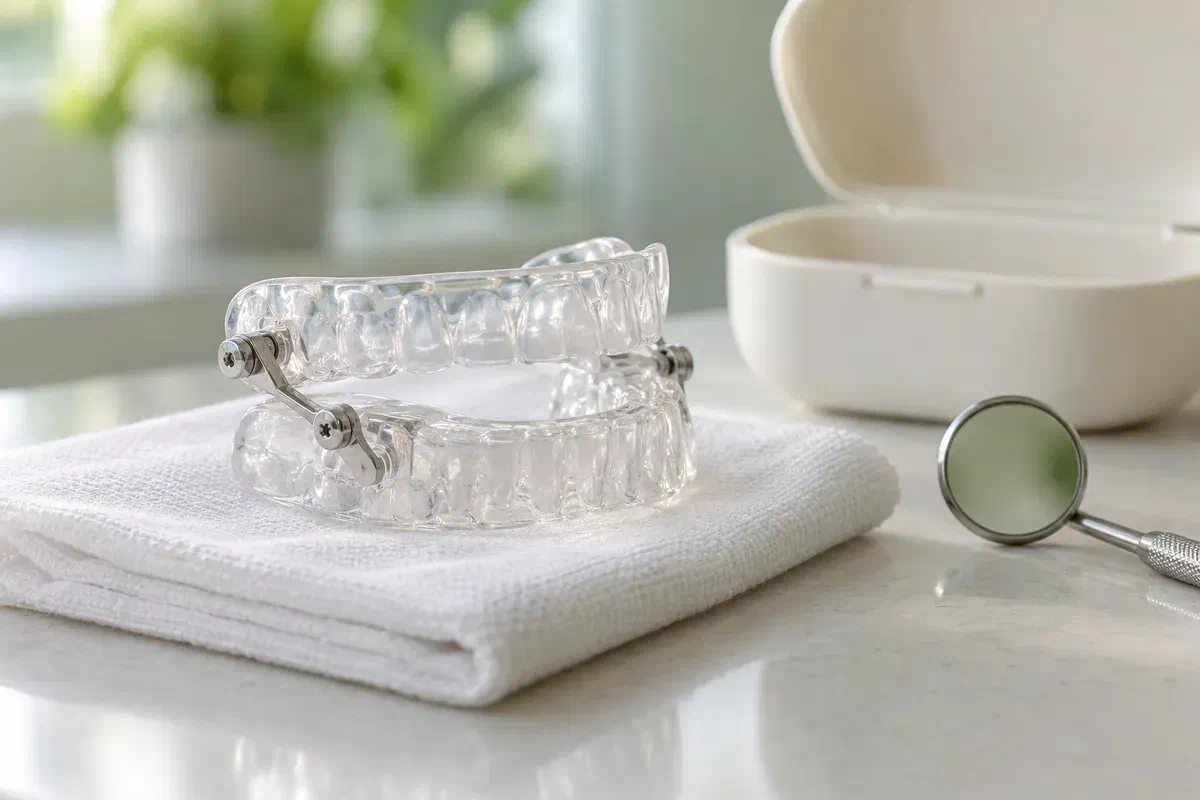
Illustrative intact sleep appliance beside a mirror and protective case before inspection
Spotting the problem in the first place

What made you stop wearing it?

Loose parts, a sharp or rough edge or a tray that doesn’t sit properly are all good reasons to stop using the appliance and call the provider treating you. A few more nights of use can make the original damage harder to read.

A crack or broken corner

Keep any separated material with the appliance rather than trying to bond it. Mention whether it followed a mishap or crept in during everyday wear. The lab and clinician will look at where it is and how the tray is built, which matters more than how noticeable it seems.

Hardware that’s loose, bent or lost

Resist fitting something from around the house or ordering a part online. Identify which piece has changed and whether anything is still missing. Should there be any chance it was swallowed or breathed in, speak to a doctor before turning to the appliance.

A change in how it seats

Tightness, a gap or pressure on one tooth can follow heat exposure, a new restoration or a shift in the bite. Avoid forcing the device on or softening it. Whether the appliance or your mouth has changed decides what needs fixing.

Choking or trouble breathing calls for 911. If a component is unaccounted for and might have been swallowed or inhaled, get medical advice without delay and explain what is missing. Keep the remaining appliance so the lost piece can be recognized.

Why the finish line matters

Mended on the bench, confirmed in your mouth

A lab can restore a cracked tray or replace hardware beautifully, but only a check in the mouth shows whether the device seats well and holds the prescribed position. The assessment at both ends considers the design, the material, the repaired area and your current teeth and gums. Before work starts, ask what it should restore and exactly how that will be confirmed afterwards.

For the stretch in between, your sleep physician should be in the picture. Let them know when the appliance goes out and roughly when it may return, and follow their interim advice. Don’t fall back on an old guard, a sports mouthpiece or a product bought online in the meantime.

Giving the lab what it needs

The original provider, manufacturer or lab may hold the design details and settings needed for a faithful repair. Bring every document you have. If the brand isn’t known, that gets resolved first, rather than having a similar-looking part fitted.

Fixing the cause, not just the crack

Describe earlier sore spots, previous breaks or dental treatment since the device was made. If something in your mouth contributed, the final fit check is the moment to catch it, but it is better still to raise it before the repair.

Knowing the full timeline up front

Ask about the scope of work, the time the appliance may be away, the expected fee and whether a lab is involved. Include the fit-check appointment in that timeline. A sound estimate separates what is settled now from what depends on inspection or the supplier.

The repair journey

Four appointments’ worth of thinking, however many visits it takes

Bring the appliance, every part and your records. Please don’t put the damaged device in to show us the problem. Some answers can be given here and some need the lab or maker, and the first visit sorts out which is which.

  1. Assessment: the full background

    Explain how the damage happened, what’s missing and whether the device is still wearable. Share who supplied it, how your sleep treatment is managed, recent dental work and any earlier repairs or home attempts.

  2. Examination: device and mouth together

    The clinician inspects the appliance and your teeth, gums and bite, to see whether the problem is limited to one part or affects the fit. Records or input from the original supplier may be needed before a repair plan is proposed.

  3. Decision: repair, replacement review or referral

    Go over the options the findings support, any lab work and the likely sequence. Ask about costs where available and who will update you. Tell your sleep physician how long the appliance may be unavailable.

  4. Return: the fit and function check

    When the appliance comes back, it is tried in and checked for fit, movement and the prescribed position before you sleep in it. Ask whether instructions have changed. Your sleep physician may also want to review treatment, because a repaired device doesn’t by itself show the therapy is working as before.

Before and after the repair

Careful storage now, careful attention later

An honest description of the damage serves the repair better than any home attempt. Keep the appliance ready for assessment, and once it is back, pay attention to how it feels in the first weeks.

Before: keep it safe and unaltered

Store the appliance and pieces in a hard case, away from pets and children. Skip bending, trimming and repeated fitting. If you’ve already tried a fix with glue, heat or a spare part, tell us exactly what you did.

During: stay in touch with your sleep physician

Your doctor can advise how to manage while the device is away. Keep PAP settings and other prescribed therapy as they are unless told otherwise, and don’t use a spare appliance simply because it still fits.

After: notice how it settles in

Once the clinician has approved the repaired device, pay attention to comfort, any new pressure spots, jaw soreness or changes in how your bite feels in the morning. Report these to the provider rather than adjusting anything yourself.

Patient information: NHLBI — keeping sleep-apnea treatment and provider follow-up connected

How the plan may take shape

Different routes, the same final check

Whatever route is chosen, ask what it should achieve and what remains uncertain. A rapid, low-cost fix isn’t a good result if the finished appliance can’t pass its fit check or the reason it broke is still present.

When the design and remaining device support it

Lab or in-office repair of your appliance

If suitable materials, components and skills are available and the rest of the appliance is in good shape, repair is a reasonable path. Ask where the work will be done, how long it may take, and what happens at the return check. Ongoing reviews still matter.

When repair can’t deliver a reliable fit

Moving toward a replacement

Major damage, warping, missing parts that are no longer made or significant dental changes can make a new appliance the more dependable choice. The clinician should explain why, and which new records would be taken so the device matches your treatment today.

When specialist knowledge or a therapy review is needed

Sharing the work with the maker or sleep team

The original supplier may handle certain repairs or know a design’s limits, and your physician may want to check your treatment once the device returns. Settle who is responsible for each step and how you’ll be kept informed.

Patient information: AADSM — device management and continued coordinated care

Questions about getting your appliance back

The end of the repair, explained

The details depend on your device, the damage and who carried out the work. Bring the appliance and its history, and ask about the return visit from the start.

(905) 876-4488
What happens at the appointment when my repaired appliance comes back?
The clinician tries the device in, checks how it seats and moves, and reviews whether the prescribed jaw position has been restored. They’ll go over any changed instructions and what to watch for. Ask whether your sleep physician should be told it’s back in use.
Why can’t I just pick up the repaired appliance and start wearing it?
Even a well-made repair can change the fit slightly, and your mouth may have changed while the device was away. A clinical check helps make sure it’s comfortable and holds the right position before you rely on it at night.
How will I know if the repaired appliance isn’t right?
Watch for new pressure points, jaw or tooth soreness, a bite that feels different in the morning, or the device feeling loose or tight. Report any of these to the provider instead of adjusting it yourself.
Should I tell my sleep physician once the appliance is back in use?
Yes. Let them know it has been repaired and when you resumed wearing it. They may want to review your treatment, especially after a longer interruption or if your symptoms changed during the gap.
Does a repaired appliance need different care from before?
Sometimes. Ask at the return visit whether cleaning, storage or handling instructions have changed. A repaired area may need particular care, and the provider can tell you what to avoid.
How many trips from Rockwood should I plan for?
Usually at least an assessment and a return fit check, though the exact number depends on the damage and whether a lab or the original supplier is involved. Ask at the first appointment so you can plan the whole sequence.
Repair planning for Rockwood

Start the repair with the finish in mind.

Give Milton Dental Clinic a call, describe the appliance and the damage you’ve spotted, and say whether you’re still using it. We can explain how assessment and the later fit check are arranged, and whether we’ll need anything from the original provider.

Whether repair is possible, and the timing and cost involved, depend on examination and any lab or supplier involvement.

Visit Milton Dental Clinic
Unit 1, 342 Bronte St. S, Milton, ON L9T 5B7
Get directions Clinic hours
Monday–Thursday
11am–7pm
Friday–Sunday
By appointment only

Areas we serve

  • Milton
  • Oakville
  • Mississauga
  • Georgetown
  • Halton Hills
  • Acton
  • Campbellville
  • Brampton
  • Burlington
  • Puslinch
  • Rockwood
  • Erin
  • Caledon
  • Etobicoke
  • Old Milton
  • Bronte Meadows
  • Timberlea
  • Dorset Park
  • Dempsey
  • Clarke
  • Beaty
  • Coates
  • Harrison
  • Scott
  • Willmott
  • Ford
  • Bowes
  • Cobden
  • Walker
  • Mountain View
  • Milton Heights
  • Hawthorne Village
  • Valley View
  • Fallingbrook
  • Nassagaweya
  • Trafalgar
  • Esquesing
  • Nelson
  • Brookville
  • Moffat
  • Glen Williams
  • Norval
  • Limehouse
  • Stewarttown
  • Ashgrove
  • Hornby
  • Silver Creek
  • Speyside
  • Scotch Block
  • North Oakville
  • River Oaks
  • Glen Abbey
  • West Oak Trails
  • Palermo
  • Bronte Creek
  • College Park
  • Joshua Creek
  • Uptown Core
  • Preserve
  • Iroquois Ridge
  • Lisgar
  • Meadowvale
  • Meadowvale Village
  • Churchill Meadows
  • Erin Mills
  • Central Erin Mills
  • Streetsville
  • East Credit
  • Creditview
  • Heartland
  • Sheridan
  • Mount Pleasant
  • Credit Valley
  • Huttonville
  • Churchville
  • Springbrook
  • Northwest Brampton
  • Bram West
  • Fletcher's Meadow
  • Fletcher's Creek South
  • Alton Village
  • Orchard
  • Millcroft
  • Headon Forest
  • Tansley
  • Brant Hills
  • Tyandaga
  • Kilbride
  • Lowville
  • Aberfoyle
  • Morriston
  • Arkell
  • Hillsburgh
  • Freelton
  • Carlisle
  • Waterdown
  • Flamborough
  • Mountsberg

How can we help?

Milton Dental Clinic

Have a question about your smile? Choose the option that works best for you.

For urgent dental concerns, please call.
Messages are reviewed during clinic hours.